
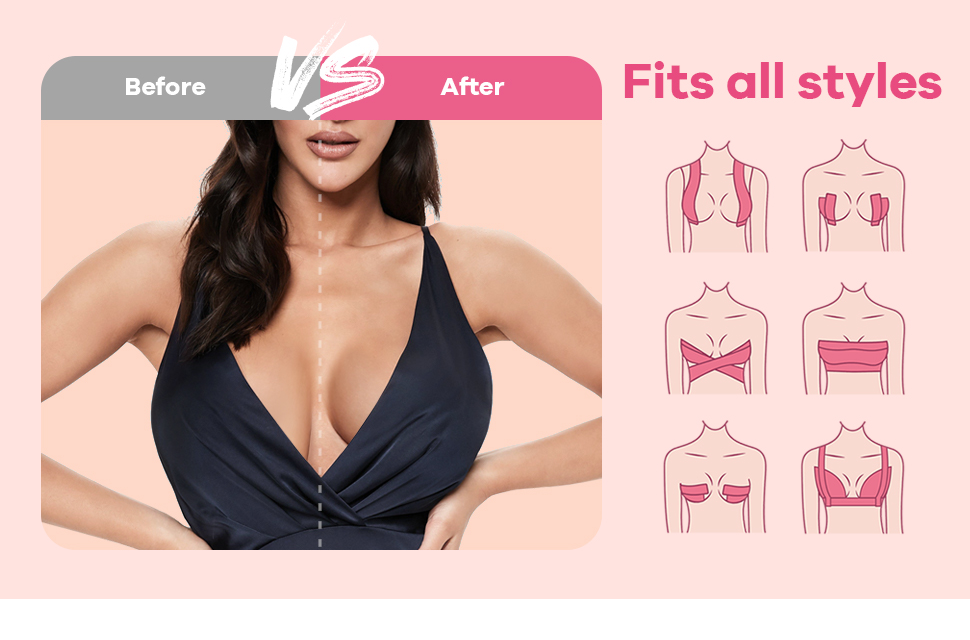
Boob tape has become an essential hack for anyone looking to wear backless, strapless, or plunging neckline outfits without the constraints of a traditional bra. It offers lift, support, and shape while remaining invisible under clothing. Whether you’re preparing for a special event or just want to feel confident in your outfit, knowing how to properly use boob tape is key to achieving the best results. In this guide, we’ll walk you through everything you need to know about using boob tape effectively and comfortably.
What is Boob Tape?
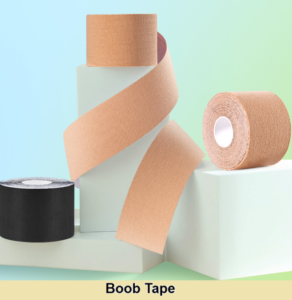
Boob tape, also known as breast tape or fashion tape, is a strong adhesive tape designed to lift and support the breasts. It can be used with a variety of clothing styles and is versatile enough to accommodate different breast shapes and sizes. Most boob tapes are made from cotton or synthetic materials that are breathable and flexible, and they come with a strong adhesive that sticks securely to the skin without causing irritation.
Benefits of Using Boob Tape
- Versatility: Works with backless, strapless, low-cut, or sheer outfits.
- Lift and Support: Offers natural-looking lift and helps shape the breasts.
- Invisible Support: Provides a seamless look under clothing with no visible straps.
- Customizable Fit: Allows you to adjust the tape according to your body and the specific outfit you’re wearing.
Materials You’ll Need
Before you start taping, make sure you have the following:
- Boob Tape: Choose a high-quality tape designed specifically for skin. Options like cotton-based tapes or medical-grade adhesive tapes work well.
- Nipple Covers or Pasties: These help protect your sensitive skin from the adhesive and prevent irritation.
- Scissors: To cut the tape into strips.
- Mirror: For better visibility and to ensure even application.
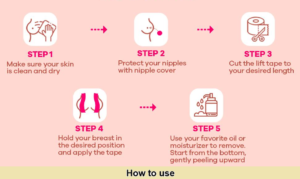
Step-by-Step Guide on How to Apply Boob Tape
1. Prep Your Skin
- Start with clean, dry skin. Make sure you don’t have any lotions, oils, or moisturizers on your chest, as these can prevent the tape from sticking properly.
- If you have sensitive skin, consider using nipple covers or pasties to protect delicate areas. These are usually made of silicone or fabric and will create a barrier between your skin and the tape.
2. Cut the Tape
- Measure the length of the tape based on the area of your chest where you need support. You can cut multiple strips for each breast depending on how much lift and coverage you need.
- If you’re wearing a backless or strapless dress, you may want to cut the tape into longer pieces to provide maximum lift from the base of your breast to the top of your shoulder.
3. Lift and Position Your Breasts
- Stand in front of a mirror to get a clear view of your chest.
- Gently lift your breast with one hand to your desired position. This is where you want the tape to hold your breast, so take your time adjusting to get the perfect lift.
4. Apply the Tape
- Start applying the tape from underneath the breast, pulling upwards as you stick it to your skin. This upward motion will give you the desired lift.
- Secure the tape in place by pressing down gently but firmly to ensure it sticks well. Smooth out any wrinkles or bubbles for a seamless look.
- Depending on your outfit, you can apply additional strips of tape to the sides or across the top for more coverage and support. For example, if you’re wearing a plunging neckline, apply the tape diagonally from the outer side of your breast toward your shoulder for a lifted, secure fit.
5. Adjust as Needed
- Once the tape is applied, stand back and check how your breasts look under the outfit. You can make adjustments by adding more tape or repositioning the existing tape if necessary. The goal is to create an even, lifted look on both sides.
6. Test for Comfort and Durability
- Move around a bit to ensure that the tape feels comfortable and secure. Boob tape should stay in place even as you walk, dance, or sit.
- If you’re preparing for an event, it’s a good idea to apply the tape a few hours before to check how it holds up. Make sure it can withstand any movement or activity throughout the day or night.
Removing Boob Tape
Removing boob tape can be tricky if done improperly, so follow these tips to ensure a gentle removal process:
- Loosen the Edges: Gently peel off the edges of the tape, starting from the top. Pull slowly to avoid irritation.
- Use Oil or a Warm Cloth: Apply a small amount of baby oil or coconut oil to the area where the tape is stuck. This will help dissolve the adhesive and make removal easier. Alternatively, you can use a warm, damp cloth to soften the adhesive.
- Remove Slowly: Continue to peel the tape off slowly, applying more oil or warm water as needed to prevent pulling or damaging your skin.
Common Mistakes to Avoid
- Using Lotion Beforehand: Avoid applying lotion or oil before taping, as this can cause the tape to lose its adhesive properties.
- Too Much Tension: Don’t pull the tape too tightly, as this can cause discomfort and restrict your movement. It should feel secure but not tight.
- Skipping a Skin Patch Test: If you have sensitive skin, always do a patch test with the tape on a small area of your skin before applying it to your chest. This will help you avoid irritation or allergic reactions.
Types of Boob Tape
There are several different types of boob tape available, so it’s important to choose the right one for your skin type and outfit:
- Cotton Boob Tape: Breathable and comfortable, this option is great for all-day wear.
- Silicone-Based Tape: Offers a smooth finish and works well for sensitive skin.
- Waterproof Tape: Ideal for events where you might sweat or move around a lot, as it holds up well in humid conditions.
Conclusion
Boob tape is a versatile and reliable solution for achieving the perfect lift and support without the need for a bra. Whether you’re wearing a strapless dress, plunging neckline, or backless outfit, knowing how to use boob tape properly can help you feel confident and comfortable. By following these steps, you’ll be able to apply boob tape with ease and enjoy a flawless look every time.

